In this post I'll show you how to create a certificate to use for Unified Messaging to allow SFB/UM integration.
Create A Certificate For UM
We'll need to create a certificate in Exchange in order for SFB/UM traffic to use TLS.
The main requirement is that the Exchange Server FQDN's need to be present on the cert.
**Note** If you have multiple Exchange servers, include each server name on a single cert.
We're going to use a Private CA (Certificate Authority) because this is internal only, so you don't need to spend money on a public cert.
Also, we won't be using our SAN cert since it's not good practice to use server FQDNs because it can cause problems.
Certificate Request
On an Exchange server, open the EAC and navigate to Servers > Certificates.
Click the + and leave the first option "create a request for a cert from a certificate authority" checked, and click Next
Name the cert something like Exchange UM, and click Next:
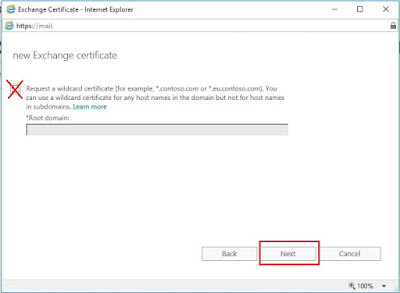
Just click Next, do not choose the wildcard option:
Click and select the Exchange server you're currently on, and click OK, then Next:
You don't need to touch anything here, just click Next:
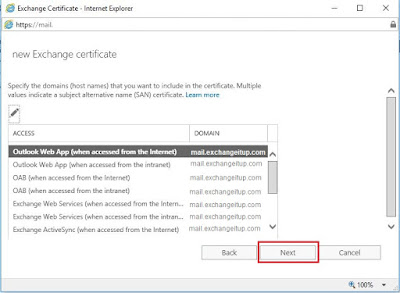
Here, you will remove all entries except your namespace (eg. mail.exchangeitup.com) and add your Exchange servers.
Select each domain name and click - button, leaving your namespace.
Click the + and type in the FQDN of each Mailbox Server, then click Next:
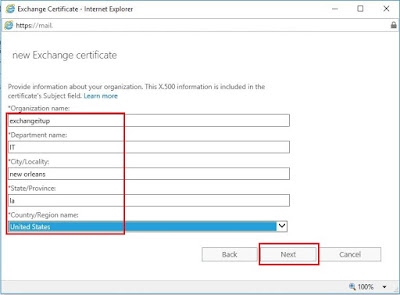
Enter your company details and click Next:
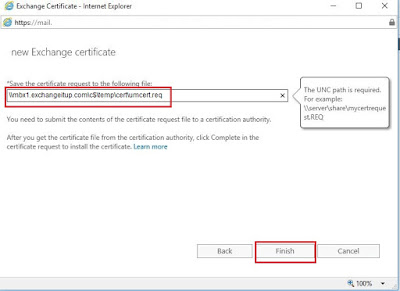
Enter a UNC path to store the request file...it's easiest to use the exchange server you're on like \\mbx1.exchangeitup.com\c$\temp\cert\umcert.req:
Browse to the path where you saved the .req and submit that file to your Internal CA.
Fire up your browser and go to your Internal CA's enrollment webpage.
Click Request a certificate:
Click submit an advanced cert request:
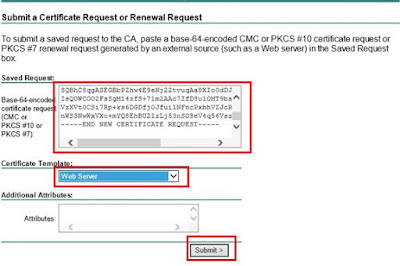
Click submit a certificate request by using...blah blah...file:
Open your umcert.req file in a text editor like Notepad and copy the whole block of text.
Then, paste it into the Saved Request form.
Change the cert type dropdown to Web Server.
And click Submit:
When it's done, click the Download certificate:
Save the .cer file on your Exchange server to somewhere like C:\Temp\Cert\ExchangeUM.cer
Complete Cert Request
Back in the EAC, you'll see your pending cert request:
Select the request and click Complete in the right-pane:
Provide the UNC of the .cer file and click OK:
Once it's finished, you'll see the cert is installed and valid:
Assign the UM Cert
Double-click your new UM cert to bring up the editor, and click services.
Put a check in the boxes for Microsoft Exchange Unified Messaging and Unified Messaging Call Router. Then click Save:
If you are overwriting another cert that is assigned to those services, you will get a prompting asking to confirm. Click Yes.
Export/Import UM Cert To Other Exchange Servers
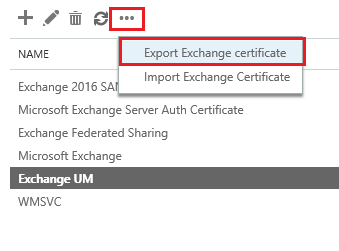
Select the UM cert and click the ..., then click Export exchange certificate:
Input a UNC path to save the .pfx file like \\mbx1.exchangeitup.com\C$\temp\cert\exchangeum.pfx and set a password click OK:
Click the ... again and select Import exchange certificate:
Enter your UNC path and password for the .pfx file:
Click the + and select all of your other Exchange servers and click OK, then Finish:
On each of your Exchange servers restart the UM Service and the UM Call Router Service by running the following cmdlets in the Exchange Management Shell (EMS):
Restart-Service MSExchangeUM
Restart-Service MSExchangeUMCR
Export/Import UM Certificate on the SFB Server
On your Exchange server, browse where you stored the exchangeum.cer file (in our case C:\Temp\Cert\exchangeum.cer) and copy that file.
Now switch over to your SFB server and paste it somewhere like C:\Temp\Cert
Go to start and search for certlm.msc and open the certificate manager.
Navigate to Trusted Root Certification Authorities > Certificates
Right-click anywhere in the right-pane, select All Tasks > Import
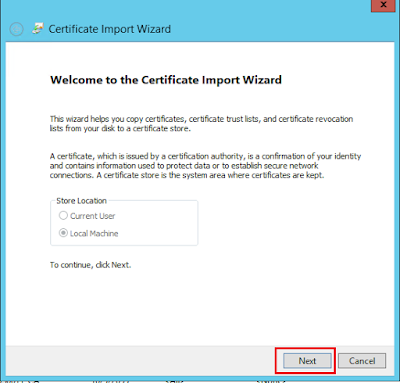
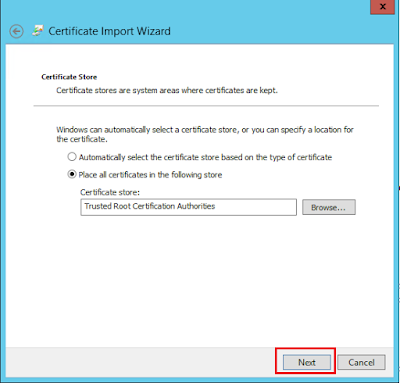
Follow the wizard to import the Exchange UM cert:
Now we have allowed the Skype For Business server to authenticate with the Exchange forest, and set SFB to trust the Exchange UM certificate.
In the next post we will set up the actual UM integration.












No comments:
Post a Comment